Halloween Costume Try-On: Preview a Look Before You Buy
For a Halloween costume try-on, open ClipTrend.ai's Halloween Costume page, upload a clear selfie, and choose a preset, add a costume product photo, or describe your idea. Press Generate Image to see yourself in the outfit with a matching setting. Use that picture to compare colors and styling before buying or making anything. It is a visual preview: it cannot measure garment fit, confirm fabric quality, or promise that a delivered costume will match.
As of October 14, 2026 · By the ClipTrend.ai Editorial Team
Disclosure: ClipTrend.ai provides the costume tool described here. The cover is an editorial illustration; the examples discussed below are the feature page's own demos, not new results made for this article.
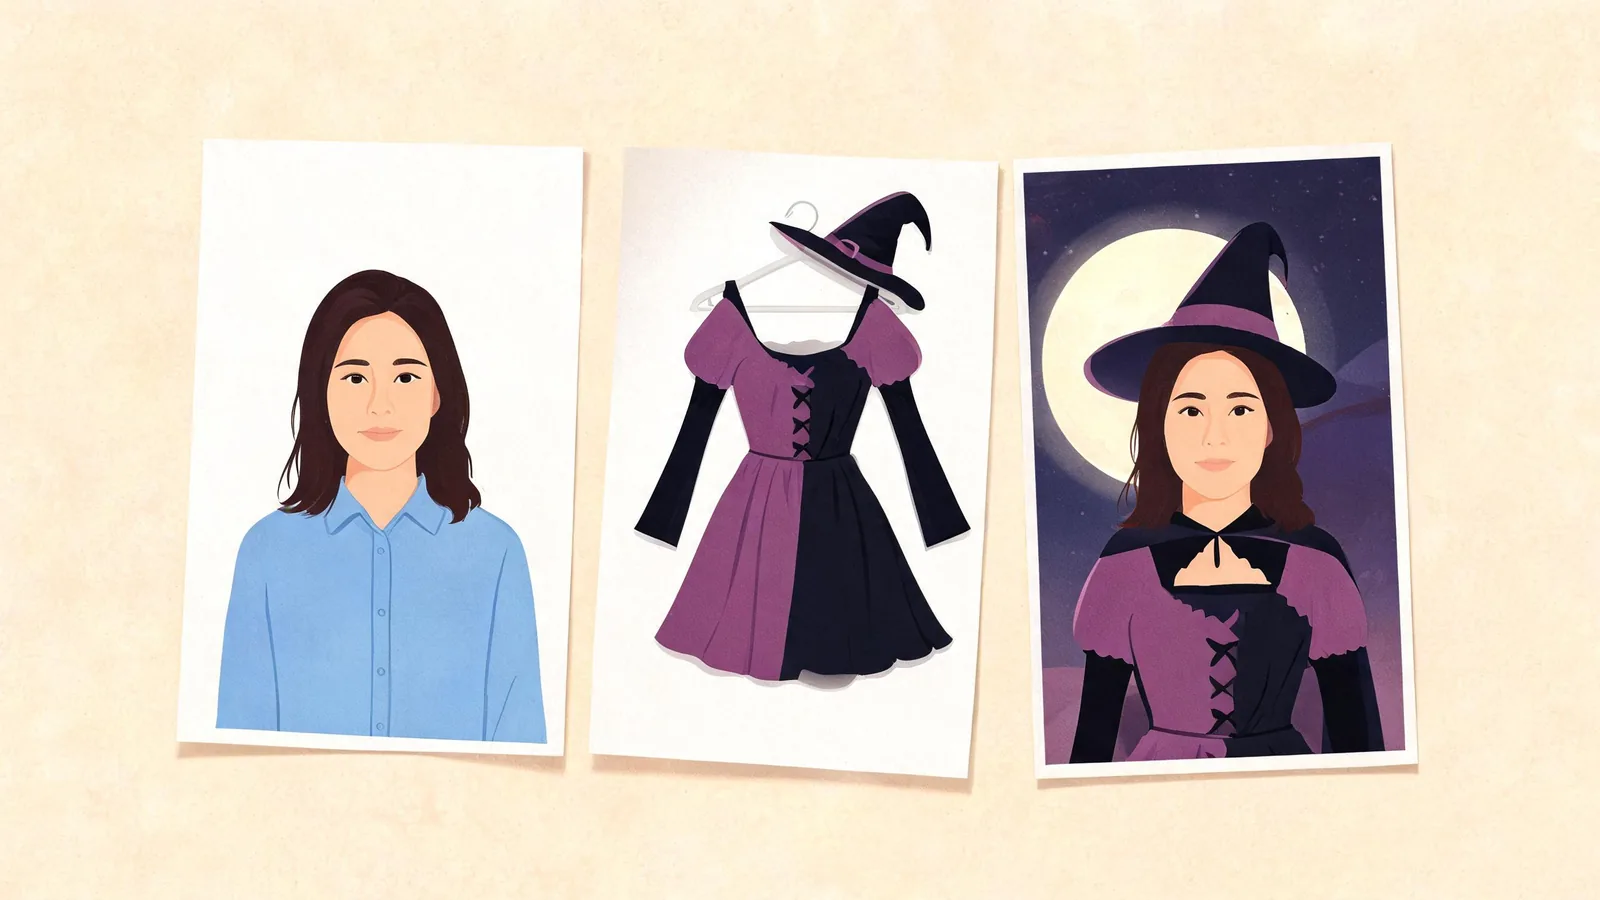
1. Decide what the preview should help you choose
Start with one shopping question. Are you deciding between a black and orange gown? Wondering whether a tall hat overwhelms the outfit? Choosing a character you can build from clothes you already own? A specific question makes a comparison more useful than generating every costume in the gallery.
Separate the visual decision from the physical one. A preview can help you consider a neckline, palette, makeup direction, or overall theme. The retailer's measurements, materials, included accessories, delivery estimate, and return policy still govern the purchase. Save the original listing so you can check those facts after choosing a look.
The studio offers 24 presets across solo and paired costumes. That total includes 12 solo choices and 12 couple looks, rather than 24 options in each mode. If you are still choosing a theme, the Halloween costume ideas guide compares wardrobe pieces and preparation across 12 directions.
2. Choose a clear source photo
Keep 1 Person selected for your first solo comparison. Upload one clear, front-facing photo with your face easy to see. Choose a picture of yourself, or someone who agreed to be included in the result and its intended use.
Use even light and leave some room around the head. Avoid a face hidden by sunglasses, a mask, hair across both eyes, or a strong filter. A simple expression gives you a familiar reference when you inspect the finished image. The page accepts head-and-shoulders or full-body photographs; a full-body source does not turn the preview into a measurement tool.
Keep the same source photo for the looks you want to compare. Changing the pose, lighting, and costume at once makes it harder to work out why one image appeals to you more than another. For example, a cape shown on a standing portrait and a gown shown on a close-up are answering different framing questions.
You do not need to wear the costume in the source photo. Ordinary clothes are fine. For practical input advice beyond this tool, see the photo-source permission checklist, particularly its checks for permission and intended use.
3. Pick one of three costume inputs
The Choose your costume area offers Pick a costume, Upload a costume, and Describe it. Use the option that matches what you know already.
| Your starting point | Input to choose | What to keep for comparison |
|---|---|---|
| You have a theme but no particular product | Pick a costume | Preset name and the pieces you like |
| You are considering a specific listing | Upload a costume | Original product image and listing details |
| You want a combination you have imagined | Describe it | The exact wording you entered |
Pick a costume: start with the page's Day of the Dead demo
The page opens with Day of the Dead selected. Its demo shows a plain selfie transformed into a look with sugar-skull makeup, a marigold crown, an embroidered outfit, and a candlelit setting. That demonstrates the scope of the transformation: makeup and surroundings can change along with the clothes.
Look at the existing demo before submitting your own photo. It gives you a reference for the page's intended style, but it does not promise the same framing or detail for every upload. You can also select a witch, werewolf, vampire, mummy, scarecrow, or another available solo preset.
Día de los Muertos has its own cultural meaning. The Smithsonian Latino Museum's learning toolkit explain remembrance and honoring ancestors. Consider that context when choosing a look or caption, rather than treating the tradition as a generic horror theme.
Upload a costume: use the outfit you are considering
Choose Upload a costume and add a product photo or a shop screenshot. Make the costume itself easy to see: a large, unobstructed image is more useful than a screenshot dominated by prices, navigation, or a collage of different outfits.
The feature page's reference-photo demo uses a pumpkin queen gown on a dress form. Its demonstration carries the orange skirt, dark bodice, cape, and crown into a portrait with a Halloween setting. Read it as an example of using a clothing reference, rather than proof that every seam or material will be reproduced exactly.
For your own comparison, save the reference and inspect distinctive details separately. If the preview adds a crown that is not included in the listing, you still need to source it yourself. If the image suggests velvet while the listing says polyester, the listing is the relevant material information.
Describe it: make the wardrobe request concrete
Use Describe it when you have an idea rather than a product image. A useful request names the character, a few clothing pieces, and the color direction. For example: “An autumn witch with a rust-colored coat, dark boots, and a small pointed hat.” This is a suggested description, not a result we generated.
Avoid combining several conflicting outfits in one request. “Witch, pirate, vampire, and futuristic armor” leaves too many decisions open. Start with one readable look, then change one element if you want another option. A described costume is a design idea; it does not identify a real item you can order.
4. Generate the photo and inspect it
Check your input and the current credit amount beside Generate Image, then submit. The page advertises a photo workflow of about a minute. Treat that as an estimate, not a deadline; completion time can vary.
Inspect the face before judging the outfit. Does the person still look like the source photo? Are the eyes, mouth, and hair recognizable? Then examine the parts that matter for your decision: neckline, cape length, hat shape, sleeve style, and accessory placement.
Do not accept an attractive image automatically. A hand with the wrong shape, a collar merging into the neck, or a prop blending into the sleeve can distort your impression of the costume. Keep the image only if it answers your original question clearly enough. The gallery and demos show possibilities, not a guarantee of perfect identity or garment reproduction.
5. Compare a short list before ordering
Generate your candidates using the same source photo, then compare the saved images in a separate view. You can place them next to each other in a phone album or document. This keeps the comparison simple without assuming the studio provides a dedicated comparison dashboard.
For a black cape versus an orange gown, first compare the color near your face. Next consider whether the silhouette suits the event you have planned. Finally, check which accessories already exist in your wardrobe. A convincing image can still suggest an outfit that is impractical to assemble.
| Check | Use the preview for | Check elsewhere |
|---|---|---|
| Color and styling | Whether you like the overall direction | Actual product colors and fabric photos |
| Outfit pieces | Which accessories complete the look | What the retailer includes |
| Garment fit | A rough visual impression only | Size chart and your measurements |
| Wearability | A reminder of possible obstacles | Walking, sitting, warmth, and visibility in the real outfit |
The U.S. Consumer Product Safety Commission's costume guidance advises keeping costumes short enough to prevent trips and falls. Those are checks to perform on the actual clothes. A generated picture cannot establish them.
6. Add a second person or make a short video
If you are choosing coordinated costumes, switch to 2 People and upload a separate selfie of each consenting person. You do not need a photograph of the two of you together. The gallery includes pairs such as angel and devil, vampires, scarecrows, and a zombie bride and groom.
Keep the decision shared: each person should approve the theme and their own appearance. A strong paired image is not a reason to choose clothing one person dislikes wearing. For deeper pair-specific planning, the couples Halloween costume ideas guide covers coordinated alternatives.
Once you like a photo, the studio can turn it into an optional 5-second video. Review the generated still before adding movement. The video is useful for a party invitation or social post; it does not give you extra information about garment sizing. Inspect the moving face and clothing again before sharing.
FAQ
What kind of selfie should I upload?
Use a clear, front-facing photo with an unobstructed face and even light. Head-and-shoulders and full-body photos are supported. Keep the same source for a fair comparison, and only upload people who agreed to be included.
Can I upload a screenshot from a costume shop?
Yes. Select Upload a costume and add the screenshot or product photo. Crop unrelated page elements so the outfit is easy to identify. Keep the original listing to confirm sizing, fabric, and included accessories.
How should I compare several costumes?
Use the same selfie for each candidate and compare your saved images together. Judge one question at a time, such as color or accessory shape. The preview does not confirm that the pictured accessories come with the product.
Can an AI try-on tell me whether a costume will fit?
No. It creates an image of a look, not a physical fitting or measurement. Use the retailer's size chart, your measurements, and the actual garment to check fit, comfort, and movement.
Preview your first candidate
Choose the outfit you are seriously considering, keep its listing nearby, and start a Halloween costume try-on. Use the result to narrow your choice, then check the real clothes before committing.