AI Ghost: How to Turn Your Photo Into a Ghost
To make an AI ghost photo, open ClipTrend.ai's AI Ghost studio, upload a clear, front-facing selfie, leave the Ghost preset selected, and press Generate Image. Review your ghost portrait before downloading it or choosing an optional five-second video. You become the ghost: white Victorian clothing, a cold-blue glow, floating hair, and manor mist, with your face uncovered. You can also use two separate selfies to make a ghost couple.
Updated October 12, 2026 · By the ClipTrend.ai Editorial Team
Disclosure: ClipTrend.ai offers the studio described in this guide. The cover is an illustration of the idea, not a generated product result.
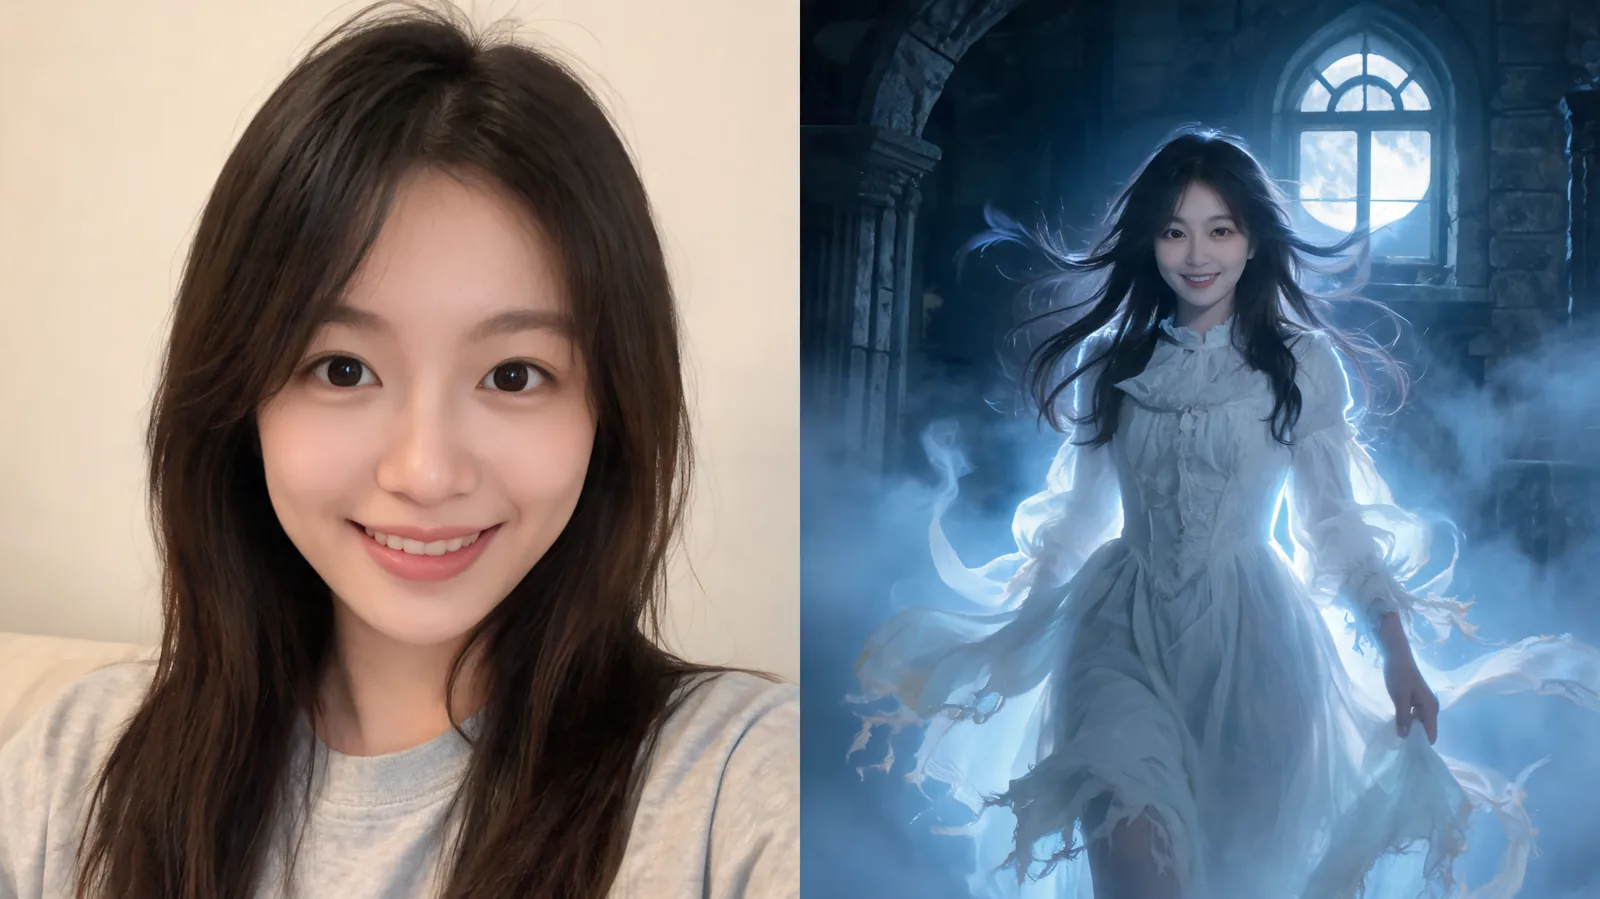
1. Choose a selfie that shows your face clearly
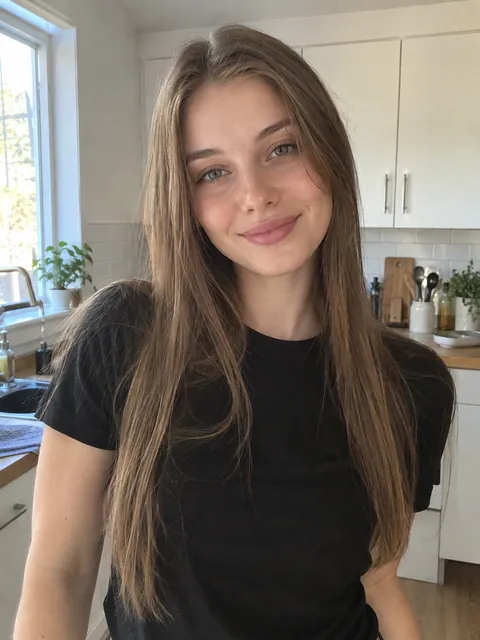
Use a photo of yourself, or someone who has agreed to the transformation. A recent head-and-shoulders picture facing the camera is a sensible starting point. Choose even light, open eyes, and a face large enough to inspect without zooming into a tiny crop.
You do not need to dress as a ghost first. The studio creates the costume and setting from the selected theme. An ordinary shirt and an uncluttered background give you a straightforward starting photo. Avoid sunglasses, a covered mouth, strong beauty filters, or hair hiding the eyes; those details make it harder to judge whether the final face still looks right.
Longer hair gives the floating-hair part of the look more visible material to work with. Keep it away from the face in the input and leave some room around the head. Short hair is fine too: the clothing, glow, and mist still carry the ghost theme. This is a preparation tip, not a promise that every strand will be preserved.
If a friend supplies the picture, ask two separate questions: may you transform it, and may you share the result? A yes to the first does not automatically cover a public Halloween post.
2. Upload the photo in 1 Person mode
As of October 12, 2026, the Ghost page opens with the solo Ghost preset picked for you. Use 1 Person for a portrait of yourself, then upload the photo under Upload your photo. Confirm that the preview shows the intended person before you generate anything.
Start with a single person in the input rather than a group picture. If the face is blurry in the upload preview, retake the photo instead of hoping the transformation will reconstruct it accurately. If you cropped the image, keep the whole face and a little space above the hairline.
There is no need to find a separate ghost lens, film a reaction, or upload an existing video. This workflow starts with a still photo. The animation choice appears after you have a finished costume portrait to review.
3. Keep Ghost selected for the first attempt
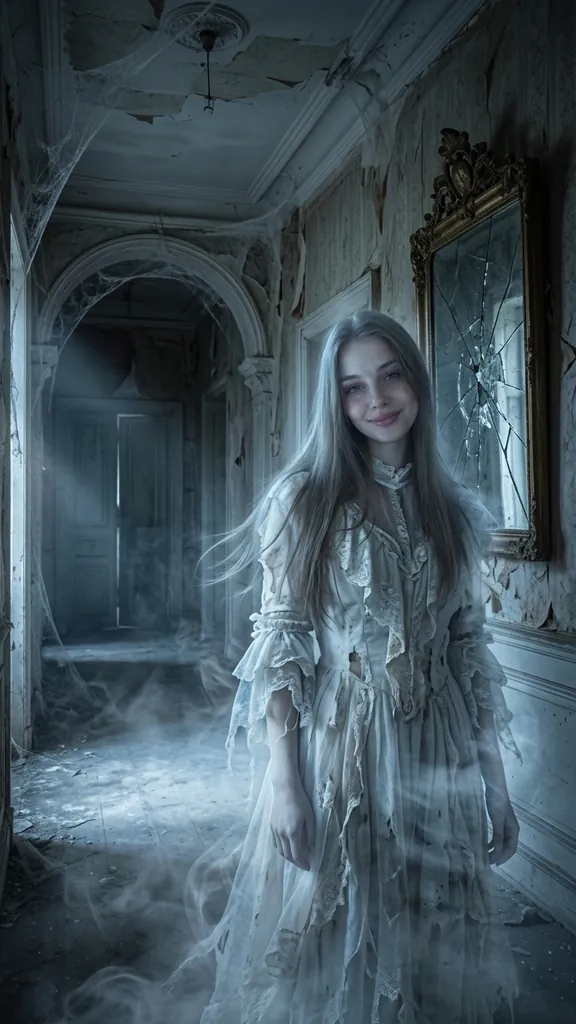
In Pick a costume, retain Ghost. The solo preset describes a ghost from another century: tattered, flowing white Victorian clothes, a soft cold-blue glow, faint under-eye shadows, hair drifting as though underwater, and fabric edges fading into mist. The setting is a moonlit abandoned manor hallway.
The intended effect keeps your face visible and recognizable; it does not swap your face with a stranger's or hide it beneath a sheet. Generated details can still change, so treat that as something to check in the result rather than a reason to skip reviewing it.
For a concrete product example, the page provides an ordinary input selfie, a ghost example portrait, and an example video. These show the page's own demonstration. Your photo, expression, and generated details will differ.
When another costume input makes sense
The studio also has Upload a costume and Describe it, alongside 12 solo and 12 couple presets. Use a costume reference when you want to explore particular clothing, or a short description when you want a different fully clothed, non-gory concept. Those are alternatives to the ready-made Ghost look, not extra requirements for using it.
For a first ghost portrait, the preset gives you a clearer test: one source photo and one defined theme. If you change the costume method, do not expect the standard Ghost wardrobe and background to remain identical. Review the new result against the direction you actually supplied.
4. Generate the image and inspect the portrait
Press Generate Image after checking the uploaded photo and selected costume. Read the credit amount displayed beside the control before confirming. The page estimates a photo in about a minute; completion can take longer, and that estimate is not a deadline.
Keep the tab available while the image is processing. Avoid starting several attempts simply because the first is still running. Wait for the result or a clear status message, then decide what to do next.
When the photo appears, check the face before admiring the background. Is the person immediately recognizable? Do the eyes and mouth look natural? Is the face uncovered? Next, look at the hair, neckline, hands if visible, and edges where fabric meets mist. A dramatic setting should not distract you from an obvious malformed detail.
You can use this compact review before saving:
- The face belongs to the intended person and remains easy to recognize.
- Hair and clothing have plausible shapes, without an extra hand or merged features.
- The costume is fully clothed and the effect has no gore.
- The image works at the size where you plan to share it.
- Everyone pictured approves the finished version.
If identity or detail looks wrong, begin by improving the source selfie. Retake a dim or blurred selfie in even light before adding more costume instructions. You can make another attempt, but do not assume repeated generation will produce an identical portrait.
5. Use 2 People for a Victorian ghost couple
For two people, switch to 2 People and upload one clear selfie under Person 1, then another under Person 2. You do not need a photo taken together. Person 1 occupies the left side; Person 2 occupies the right, so check the order before generating.
The two-person ghost alternative is Victorian ghosts. Its wardrobe differs from the solo white Ghost look: the pair uses a faded grey frock coat and cravat, plus a flowing pale Victorian gown, with a cold-blue glow and misty edges in a moonlit ballroom.
Use the duo option for a shared party invitation or a coordinated Halloween portrait. Friends can use it too. Ask both people to approve their own face and the combined picture; a result that flatters one person but distorts the other is not ready to share.
For example, two friends planning a manor-themed party could upload separate daylight selfies and inspect the combined portrait together. That is a suggested use, not a claim that a particular picture has been generated. If the goal is choosing real clothes, the couples costume preview guide explains how to compare outfits before buying. A ghost portrait cannot tell you how a physical garment will fit.
6. Choose a still photo or an optional video
A finished photo is enough for a profile picture, private message, or party invite. Download it once you are happy with the details. Animation is a separate choice, not a required final step.
The optional video is five seconds and vertical. The result panel offers Standard · 480p, which opens in Image to Video, and HD · 768p with sound, which runs from the studio. Read the displayed credit quote for the option you choose. The photo's approximate one-minute timing does not promise the same wait for video.
| What you want to send | Choice | What to review |
|---|---|---|
| A simple ghost portrait | Keep the photo | Face, costume details, and crop |
| A lower-resolution moving reveal | Standard · 480p | The finished motion and the separate video workflow |
| A higher-resolution clip with audio | HD · 768p with sound | Motion, face consistency, and the soundtrack |
Watch the whole clip before sharing. Check that the face remains recognizable during movement and that fabric or hair does not deform noticeably. Listen to the HD soundtrack too. Do not assume motion will repair a defect already visible in the photo; choose a photo you like first.
7. Send the reveal as a shared joke
Keep the surprise in the costume, not in a claim that something supernatural happened. A message such as “I made myself a Victorian ghost for our Halloween invite” lets your friend enjoy the reveal without mistaking the image for evidence of a haunting.
For a couple portrait, agree on the caption and audience together. Sharing privately first gives both people a chance to reject an unflattering detail. If someone says no, use your own portrait instead.
If you are interested in the social trend, the ghost filter prank explainer covers how a photo reveal differs from a live ghost lens and how to keep participants in on the joke. Do not use the picture to frighten children or persuade someone that a real ghost is nearby.
FAQ
Can I make an AI ghost photo without writing a prompt?
Yes. The Ghost preset is selected on the solo page, so you can upload a clear photo and use Generate Image without writing a costume description. The description and costume-reference options are available if you want another direction.
Does the input need to show my whole body?
Start with a clear, front-facing photo that gives the face enough detail to review. A head-and-shoulders selfie is a useful choice. You do not need to photograph yourself wearing the finished Victorian costume.
Can two people use selfies taken in different places?
Yes. In 2 People mode, upload one selfie for Person 1 and one for Person 2. The studio creates a combined costume portrait. Check both faces and the left/right order before sharing it.
Is this a live Snapchat ghost lens?
No. ClipTrend makes a new costume photo from an uploaded image, with optional animation afterward. Snapchat's Lenses guide describes effects used while creating Snaps in its camera. Choose the workflow that matches the kind of reveal you want.
Do I have to make a video after the image?
No. You can keep and download the still portrait. If you want motion, the optional five-second vertical video offers Standard 480p or HD 768p with sound; review the current credit quote before starting.
Make your first ghost portrait
Choose a selfie you have permission to use, keep the preset for your first attempt, and inspect the face before deciding on animation. Start in the AI Ghost studio with a photo you are comfortable transforming and sharing.