How to Make an AI Zombie Video: People or Pets Tutorial
To make an AI zombie video, open ClipTrend.ai's AI Zombie Video page, choose Partner or family or Pet, and upload two clear photos: you, then the person or pet who turns. Select 12 or 15 seconds and generate. The result is a vertical story with piano music, moving from a cabin confrontation to a wheat-field hug.
By the ClipTrend.ai Editorial Team · Updated October 11, 2026
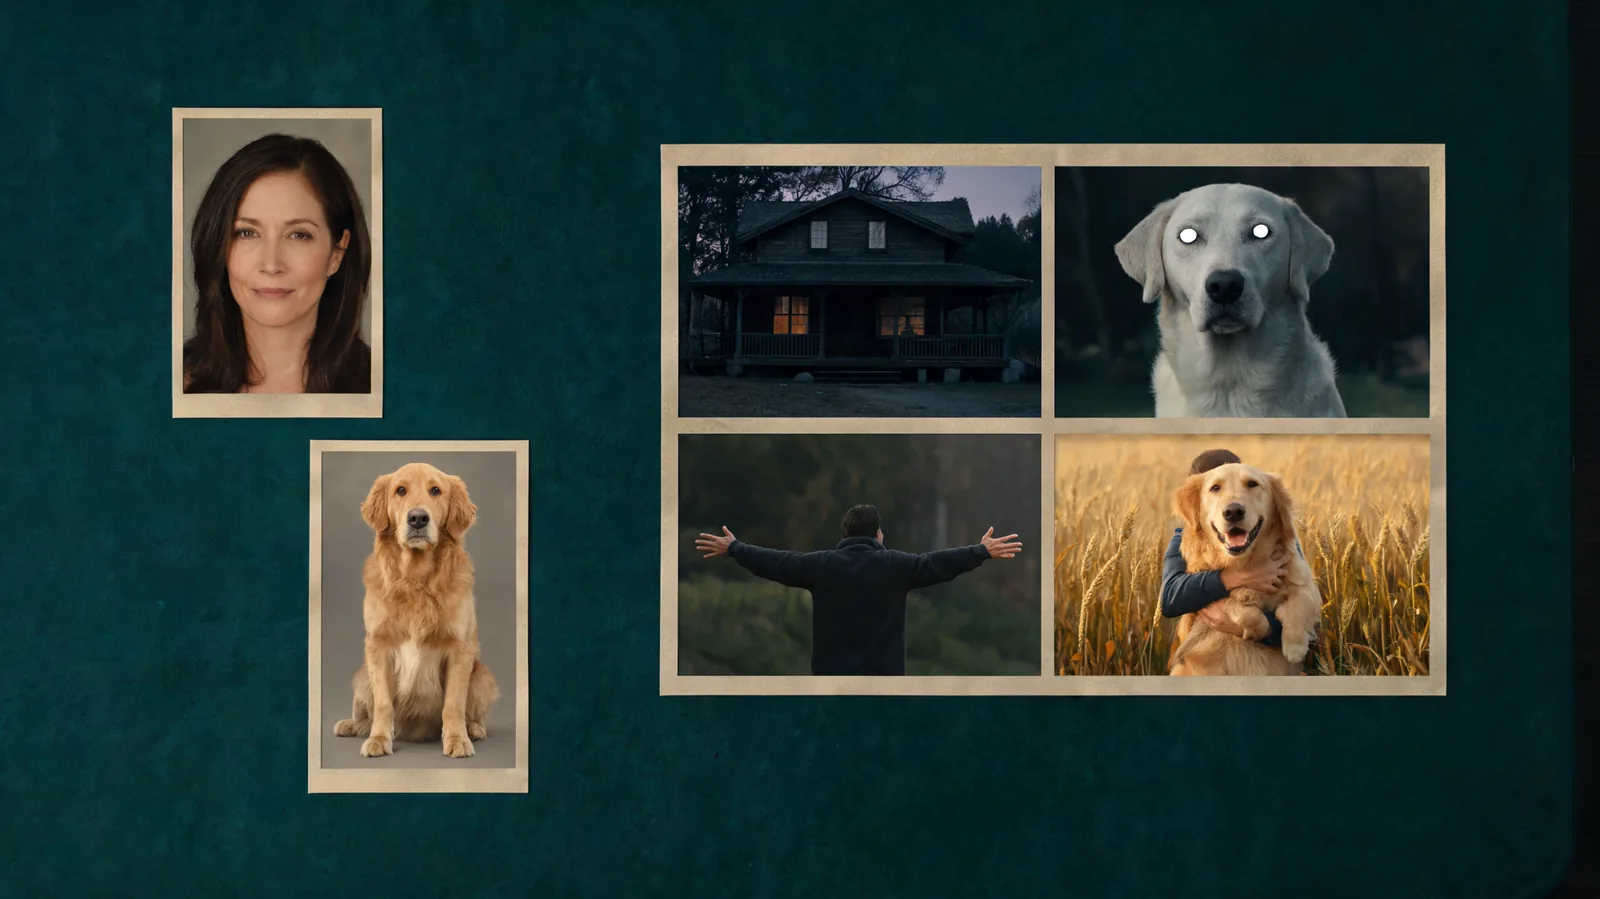
Your main preparation is choosing the right pictures and putting them in the right slots. You do not need to film a performance or supply a separate zombie portrait. This guide describes the tool as of October 11, 2026. ClipTrend.ai is an independent tool, unaffiliated with the creators behind the trend. The cover above is an editorial illustration; watch the page's own examples to see the actual effect.
1. Prepare two separate, clear photos
Choose a well-lit photo of yourself for the human role. Keep your face visible, preferably looking toward the camera. A waist-up picture is useful because it gives a clear view of your head and upper body. Avoid sunglasses, a hand covering your cheek, heavy filters, and a face lost in shadow.
For the second picture, choose one consenting adult or your own pet. Use a normal, healthy photo: the workflow creates the zombie appearance. A partner's straightforward portrait is more useful than a group photograph where several people could be the intended subject.
For a dog or cat, pick a picture with the whole animal visible. Keep the head, ears, legs, and recognizable coat markings in view. A close-up of a nose leaves less information for the running and reunion scenes. Check that fur colors are readable rather than tinted by a strong filter.
Only upload yourself, consenting adults, or a pet you have the right to photograph and depict. Do not use minors, celebrities, strangers, or someone who has not agreed. Ask about both generating the clip and sharing it; permission for one does not automatically cover the other.
2. Select the person or pet version
Open the AI Zombie Video tool and choose the tab that matches your second subject.
| Mode | First upload | Second upload | What to review in the example |
|---|---|---|---|
| Partner or family | You, staying human | One consenting adult who turns | The face reveal and the same person in the reunion |
| Pet | You, staying human | Your dog or cat | The animal's movement and restored fur colors |
The person mode also fits an adult parent or best friend. The relationship does not change the two roles: the first subject holds the gun in the cabin; the second becomes the zombie. If you want the roles reversed between two consenting adults, select their photos accordingly before submitting.
Watch the selected mode's example input and result. The person demo and pet demo are different examples of the same story. Compare the inputs with the output so you know what the page is intended to produce. You can also read its four-part storyboard before starting.
3. Put each photo in its labeled slot
In the person mode, upload your picture under You and the other adult under Who turns into a zombie. In the pet mode, upload your portrait under You and your animal under Your pet.
Look at both previews before proceeding. A common setup mistake is selecting the same photograph twice or putting the intended human in the zombie slot. Fixing that now is easier than discovering it in the finished cabin scene.
For example, you could choose a daylight portrait of yourself and a separate portrait of your consenting adult sister. She would be the one who turns. For a pet version, use your portrait and a whole-body photo of your orange cat. These are preparation examples, not claims about videos we generated.
Do not substitute a couple selfie for two separate references. Each upload should make its own subject obvious. If your available picture includes several people, choose another image or prepare a crop that clearly isolates the consenting subject before uploading.
4. Choose 12 or 15 seconds, then generate
The page offers a 12-second or 15-second clip in vertical 9:16, with sound included. Both choices use the zombie hug story. Choose the length you want rather than assuming you must stretch a shorter result afterward.
Check the current credit requirement beside Generate before submitting. The page's Free prompt section is free to read and copy; that does not make video generation free. Use the displayed requirement for your selected length instead of relying on a remembered amount.
Press Generate after checking the mode, images, and duration. Allow a few minutes for processing. The waiting display provides guidance, but completion time can vary. Finished videos also appear in My Assets, so check there if you leave the effect page while the video is being made.
You do not have to paste the seven-shot prompt into this preset. It is already designed around that sequence. If you want to study the wording, use the actual Free prompt section on the page rather than a copied prompt from an unrelated tutorial.
5. Review the seven-shot story before downloading
Watch once for the overall story, then again for identity and motion. In the 12-second prompt, the shots progress as follows; the 15-second option provides a longer version, so do not expect identical timestamps.
- The human close-up: tears, a raised gun, and a tense cabin setting.
- The doorway: the person or pet who turned enters the cabin.
- The zombie reveal: gray skin or fur, dark veins, and white eyes, with a recognizable subject.
- The decision: the human lowers and drops the gun, then opens their arms.
- The leap: the zombie rushes toward the human, ending the shot in mid-air.
- The match cut: the motion continues into a golden wheat field, where the healthy subject lands in an embrace.
- The reunion close-up: the story finishes on a quiet, affectionate moment.
The piano score changes from sad to warm at the transition. The intended effect uses no blood, wounds, or gore, and the gun is not fired. In the pet version, the reunion brings back the animal's normal coat and colors.
Review the actual result rather than assuming every detail is correct. Check faces, hands, pet legs, clothing, coat markings, and the moment where the leap becomes a hug. Generated likeness and movement can vary. If a familiar face changes noticeably, do not present the video as an accurate depiction of that person.
6. Download, check the sound, and post
Once the video is ready, download it and play the saved file. Check that the ending is present and the piano can be heard. Review the vertical framing on a phone before sharing to TikTok, Instagram Reels, or YouTube Shorts.
If you add music in a social app, listen to the combined track. A loud overlay can cover the piano's change at the match cut. You can keep the supplied score or choose a sound permitted by the platform; you do not need to imitate another creator's soundtrack to tell the story.
Use a caption that identifies the scene as AI-generated. Ask the other adult to approve the finished version before posting it publicly. A fictional horror setup may feel different once a familiar face appears in it. Sharing privately first gives them a chance to decide.
For the meaning of the ending and the wider format, read our AI zombie trend explanation. For general information about the site, visit ClipTrend.ai.
FAQ
Do I need an existing zombie photo?
No. Upload the normal photo of the person or pet in the second slot. The effect creates the zombie appearance and uses the original appearance for the wheat-field reunion.
Can I make the video with an adult parent instead of a partner?
Yes. Choose Partner or family and upload yourself plus the consenting adult parent. Confirm who should stay human and who should turn before generating.
Is a pet face close-up enough?
A whole-body pet photo is the better starting point. Keep the animal's face and fur markings visible, with enough light to show its normal colors.
Where do I find a result after leaving the page?
Finished videos also appear in My Assets. Use the same account and check the completed result there before assuming that leaving the page stopped the generation.
Does the free prompt include a free finished video?
No. The prompt is free to copy. Video generation uses the requirement displayed beside Generate for your selected settings.
Start with the right two pictures
Choose your portrait and one clear photo of the consenting adult or pet who turns. Then make your story on ClipTrend.ai's AI Zombie Video page, review the leap and reunion, and share only a result everyone involved is comfortable with.